“20,000 data points and no significant results” this was a line from an episode of Big Bang Theory (thank you screen writers.. ha ha). Just so true as to be painful.
20,000 electron micrographs and no signifiant results could be the story (though i am exaggerating a little) of my career as a microscopist. But truth be told, there are fair number of negatives that are over exposed, out of focus, scratched and water stained. Not to speak of those that have coarse staining with lead and uranium and are sectioned too thick or too thin to be totally useful. And then there was the antique microscope I used (an old Siemens 1A) which required 14 manual movements (not including learning how to be ones own built-in human light meter) to usher through one acetate negative. What fun.
I don’t know now (after 10 years) whether I can remember the sequence of motions to expose one picture, but it went something like this, record the magnification and block (grid) number, center the beam, then make sure the light is diffused evenly over the circular area marked on the screen and at the best contrast (the human light meter part), lower the little tiny central fluorescent circle piece that was the place to look at things a little more closely (with out changing the mag), flip the switch to block the beam, then lift the fluorescent screen (plate), use the knob on the lower right of the camera (large knob) to crank the plate under the beam, listen for the drop of the plate (with the film) into position (btw, sometimes plates got jammed, this required closing off the camera (if the jammed casset would allow) letting air into the camera — in the dark, manually reaching into the camera box, touching up on the bottom part of the previous “stuck” film cassette till it dropped into the bottom of the camera and repumping the camera), pressing the exposure button, cranking the handle on the camera backwards causing the plate to drop, lowering the fluorescent screen…. haha… that was the routine. I might add, that it didnt take much more time than the digital picture taking, as it requires using the mouse to click, refresh, update, finding the folder for saving, waiting, and then going back to live screen (in fact the “drag” on the screen is horrible, compared to the smooth motion of looking live into the microscope)…. my feeling is that the film actually still had better imaging properties. (yes, i still have more than 20,000 negatives). Would that i had known to take more time in the photographic part of the process always using the finest grain developer, being more precise in exposures and developing times, but i often resorted to dumb-ol-decktol ha ha..and being in a hurry. Decktol because it was cheap, being in a hurry because someone was beating the door down for results. That of course was short sighted.
Original negatives were glass plates, then with little inserts we could use acetate. THe scope could not be fitted with an automatic device for photographing…. otherwise i might have 100,000 negatives and no significant results (hahahah).
I googled for a picture of the Siemens Elmiskop 1A and up popped this reference, and this is MY OWN microscope, archived at UC, which I thought had been trashed and recycled when the building I worked in went down….. Dontcha love how the users of this scope don’t get credit….. named here…. Nikolwitz, Bell, and then me, Miller…. three users in a short 55 years. This photo is from room 310 of the original Kettering Lab that is now a parking lot.
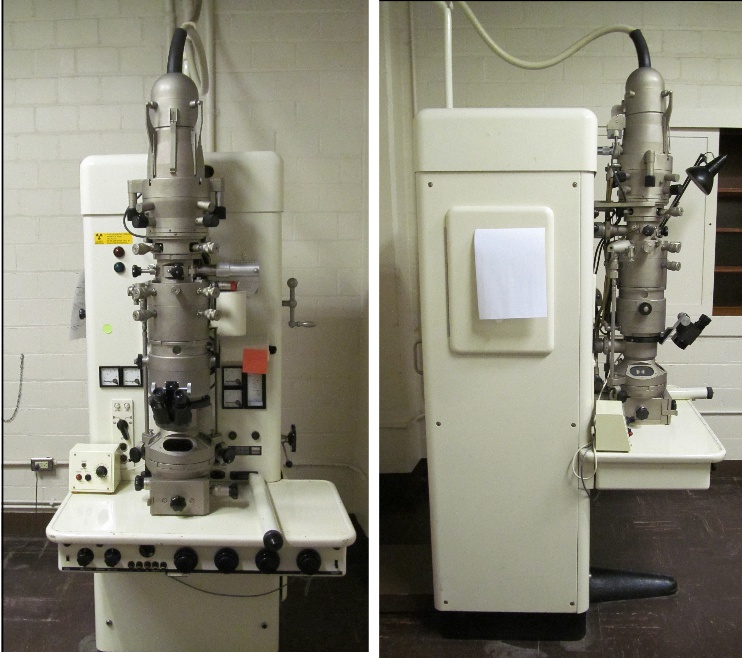
This is a photo of my empty lab just before the building was demolished and the scope moved to a display in the Chemistry – Biology Library, along with the radiation tape I put on the scope myself (hahaha) and likely put the post it note on to cover up the “light” which interfered with looking down the finding scope.
Dr. Nikolwitz ( I havn’t spelled his name right) was so possessive of this scope that no one, that is NO ONE could touch it. Later came Dr. Mary Bell. When she left, I became the individual who put it to use. I really treasured the hours looking into that scope at the phenomenon that is “life” in all its uncanny, unparalleled, beautiful order.
You cannot imagine how back in the 1980s how difficult it was to get radiation safety to come and monitor the potential radiation leak from that scope. I know that i worked on it actually pregnant, and kept bugging them to check it so i didn’t have to worry or cause damage to an unborn baby. It was an old scope even at that time.
Sadly, there is a pitiful review of that microscope in the link below from my own institution, which says precious little about the contributions to science made on this instrument or respectfully names the PIs of the NIEHS Health Sciences Grant back in the late 1960s that made it possible (as a pdf). My guess is that the two instruction manuals which were referenced in the pdf posted at the URL below, were the two blue paper binders that sat on the brown shelves behind the scope (picture on the right).
There were hazards to using that scope, the diffusion pump had mercury in the oil. The filament (which needed to be changed frequently, was at the top rounded part of the scope, and there was this very hefty static discharge arm, that I was always very very careful to have in place before I opened the top.
Get a grip on the size of that electrical cable, to cary 100,000 volts, and one time it gave way… that was the most expensive electrical cable I had every heard of…. nearlly 8000 back in the 1980s.
There was a dark room in the same room as the microscope, with safe lights for photograhy, and a developing sink and aeration baths for the glass and/or acetate film which had to be taken one by one out of a camera casette (just beneath the beam under the table part) that only held 12 sheets. So this required a continual opening and closing of the column and since there were about as many film holders as casettes, it took a long time to take images.
No automatic printing of magnifcation bar — all this needed to be recorded by hand in the dark. Besides that, film dropped from top down, so the last picture on the  top was the first to be developed…. a constant issue…I took to putting a little rectangular box beside each change in grids and briefly sketching out the image that began a new set.
Loading the film was another part of the process…. and careful attention had to be paid to the emulsion side (in the dark again ( or with a small safelight)), one learned to note the “slightly sticky” feel to the emulsion side of the film and run ones fingers around the edge of the acetate (no such thing possible for glass) sheet for the notch…. I cant remember if it was upper left hand corner… but i think that is where it was.
Another hassle was the “pole piece” which dialed in different lenses thereby changing the magnification on the plate below. That, was important to record along with the other hand written metadata.
Aligning the scope was a big pain in the neck. Every time a new filament was installed it required alignment, pulling out this diaphragm, using the two little turn screws to recenter, finding the “hotest” “brightest” spot before turning on the different lenses. Then too, as the filament aged, the bright spot (at least in my hands) would tend to move, and realignment was necessary again. Alignment was critical for focus, haha, no such thing as a “wobbler” on this scope.
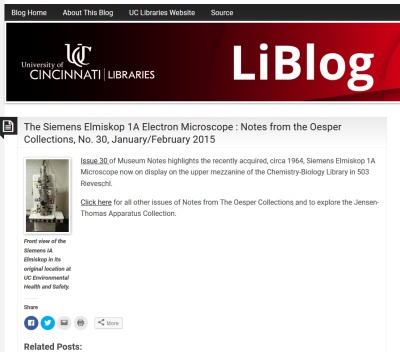
There was the recirculator issues too. Haha. Big and bulky, aerosolizing some kind of freon (green) into the air while I worked. Well… it is past now. And for the short pdf written by Mr. William B. Jensen (from two google searches) that his name should appear so prominently by this old master microscope is just silly.
Seimens 1A transmission electron microscope: Elmiskop Electron Microscope